
In Primavera P6 Professional, when you use the default “Critical” filter, it will display the critical path for the entire project (up to the last activity on the critical path), Figure 1.
What if you want to show the critical path leading to an activity, which is somewhere in the middle of the project, not the last activity?
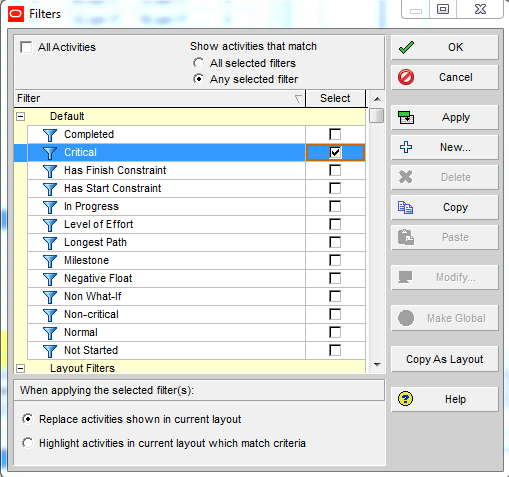
Figure 1
In this tutorial, I am going to show you how to display the critical path leading to an activity in Primavera P6 Professional schedule with multiple float paths.
Multiple Float Paths:
When you schedule a project, you can choose to calculate multiple critical float paths (sequences of activities) that affect the project schedule.
Using the multiple float paths feature in Primavera P6, you can choose to calculate a specific number of critical float paths based on the total float or free float. You can also select the activity you want the float paths to end on. By choosing an activity, you can calculate multiple float paths that affect the entire project schedule, a specific part of the schedule, or a milestone in the schedule.
To locate the multiple float paths in Primavera P6, you need to select the “options” button in the schedule tool, Figure 2.
Simply go to Tool -> Schedule -> Options or hit F9.
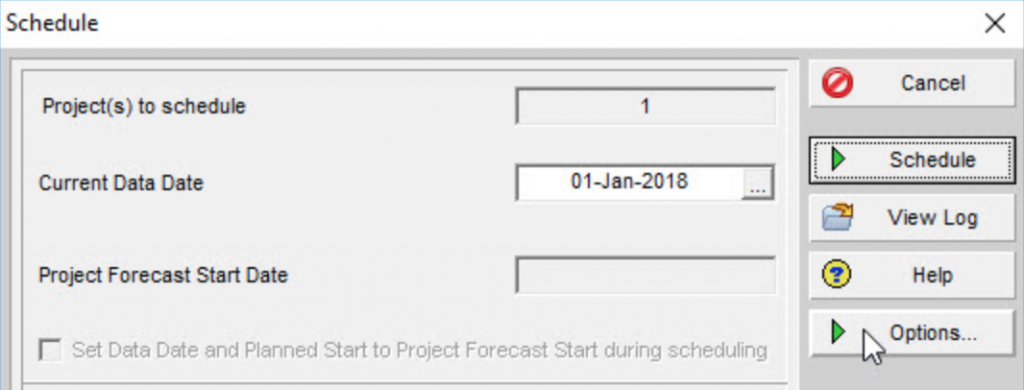
Figure 2
In the “Advanced” tab, Figure 3,
- Select ‘calculate multiple float paths’ option.
- Select “Free Float”
- Choose the activity you want the critical path ending with in “Display multiple float paths ending with activity”,
- In “Specify the number of paths to calculate” option, choose the number of paths to display; I usually choose “1”.
- Click Close and Run Schedule.
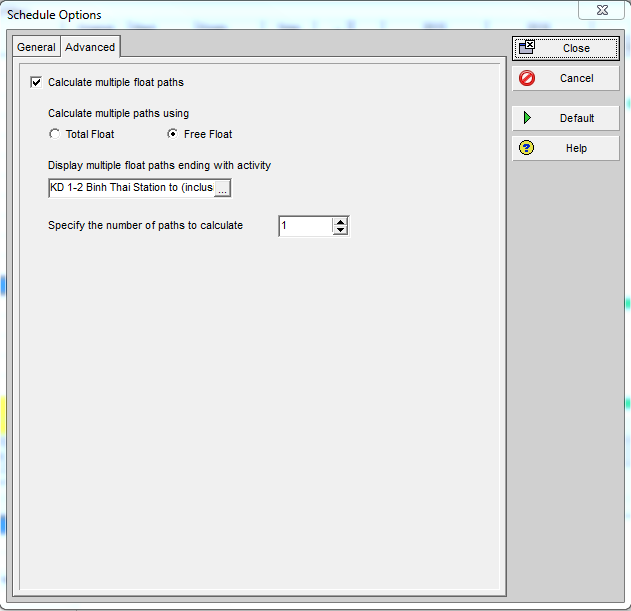
Figure 3
To better group and sort activities, go to View -> Group and Sort.
Set the group and sort feature to group by “Float Path”, which groups float paths in descending order of importance.
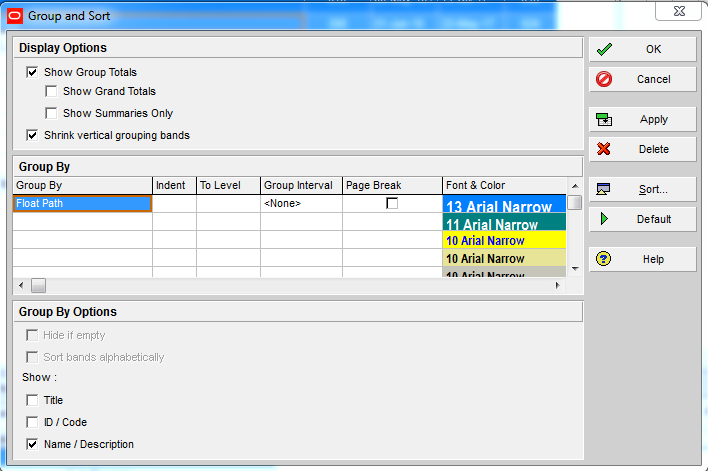
Figure 4
You can also create a Filter to hide all unnecessary activities, Figure 5.
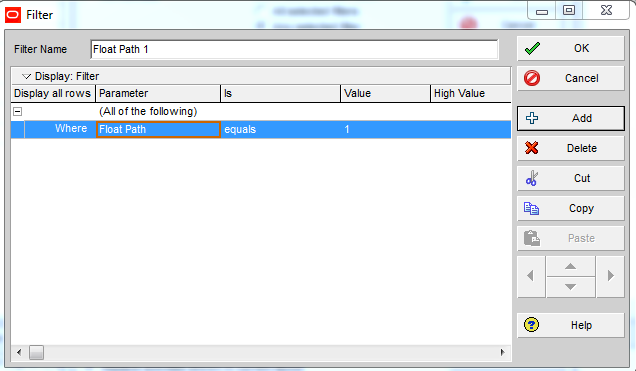
Figure 5
The resulting report is displayed in Figure 6.
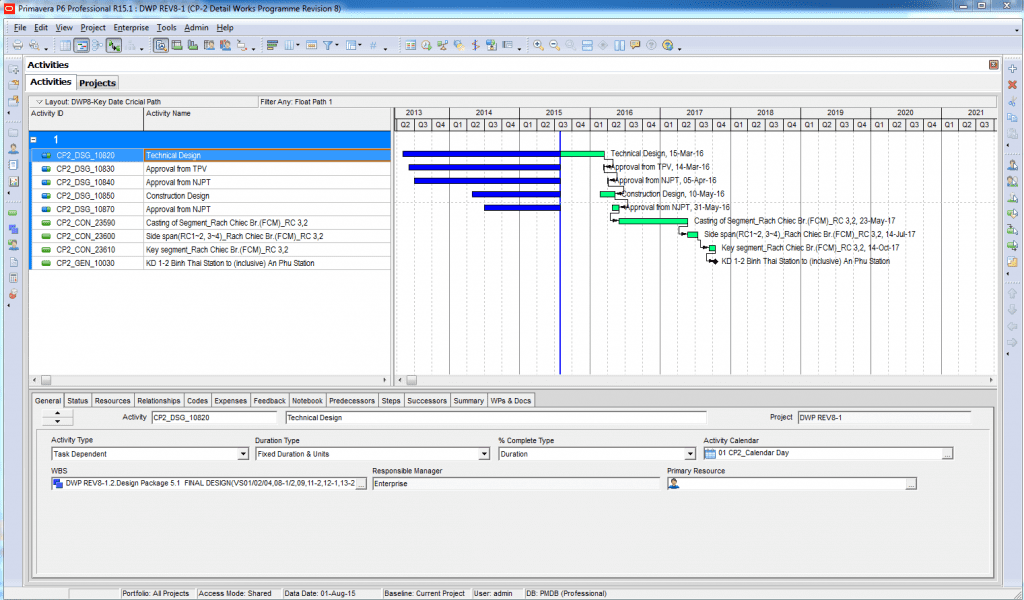
Figure 6
This is how you can display the critical path leading to a specific activity in Primavera P6.
If you have any question, please post them down below. I will make sure that I will go through as many questions as I can and assist you in answering your questions.
Additional Resources:

About the Author, Khuong Do
 Khuong Do is a Project Planner in Civil Engineering, Transportation, and Oil & Gas Industry. He has worked as a Primavera Consultant Specialist since 2006 and willing to share his passion for Primavera through lots of Tips & Trick on his personal blog.
He holds a Civil Engineering degree and a Bachelor of Information Management System. Now he is working in Petronas RAPID project, one of the biggest Refinery and Petrochemical complex, in Pengerang – Malaysia.


![[Free 90-min Masterclass] How to Avoid Project Delays Turning into Costly Claims](https://www.projectcontrolacademy.com/wp-content/uploads/2025/08/September-2025-Webcast-Chris-Carson-H01-Yellow-2048x1152.jpg.webp)
![[Free 90-min Masterclass] The Ultimate Leadership Recipe for Project Professionals](https://www.projectcontrolacademy.com/wp-content/uploads/2024/08/4-2048x1152.jpg.webp)


