
Assume that you have a Primavera schedule with actual data & progress. Now you want to remove actuals so you can develop an “As-Planned” schedule. In this post, I will show you how to do this.
Consider a simple project with actual data as illustrated below:

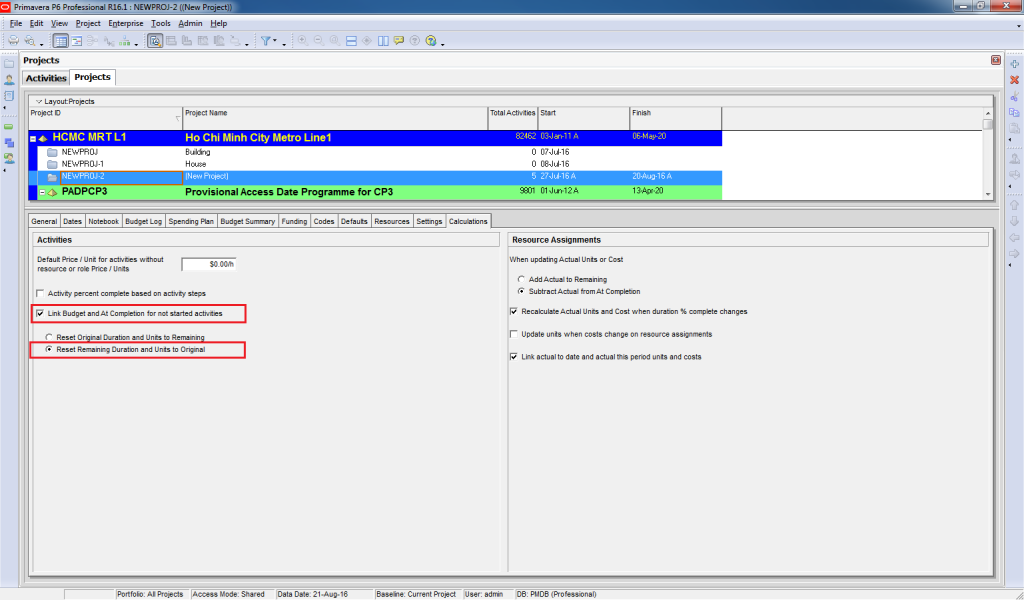
STEP 1: Change Calculation Settings
To remove actuals, first, go to Project window -> Calculation tab. Highlight the project, and checkmark the following 2 options :
1. “Link Budget and At Completion for not started activities”
2. “Reset Remaining Duration and Units to Original”
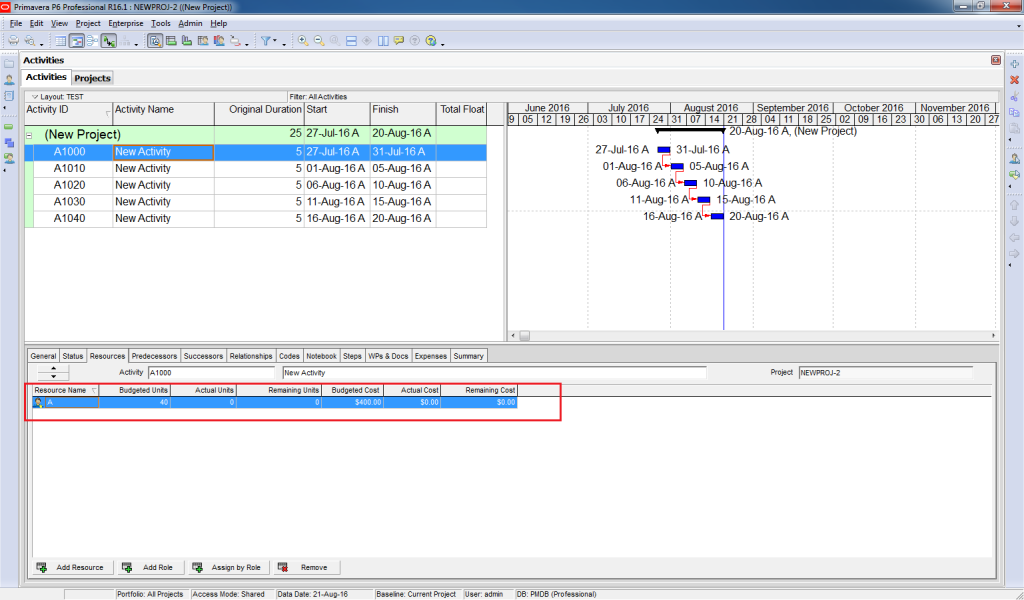
STEP 2: Reset Unit and Cost to Zero
For simplicity, let’s assume that we only have “Labor” resources in this project.
Now go back to the Activity window and reset Unit and Cost to zero.
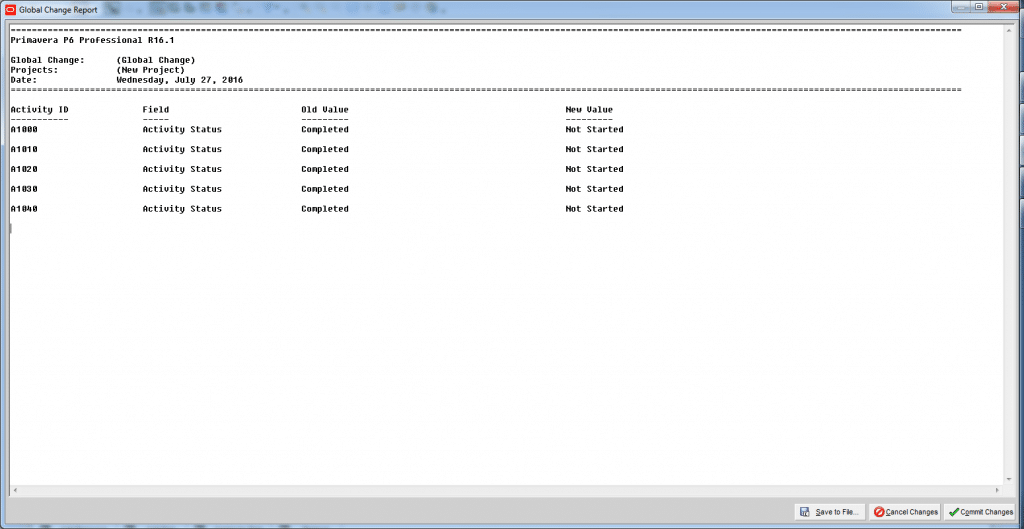
Go to Tool -> Global Change. Click New. Select the value as displayed in the snapshot below:

Click on the Change button. Primavera will show you the preview of the change.

If you are satisfied with the changes displayed, click on Commit Changes.
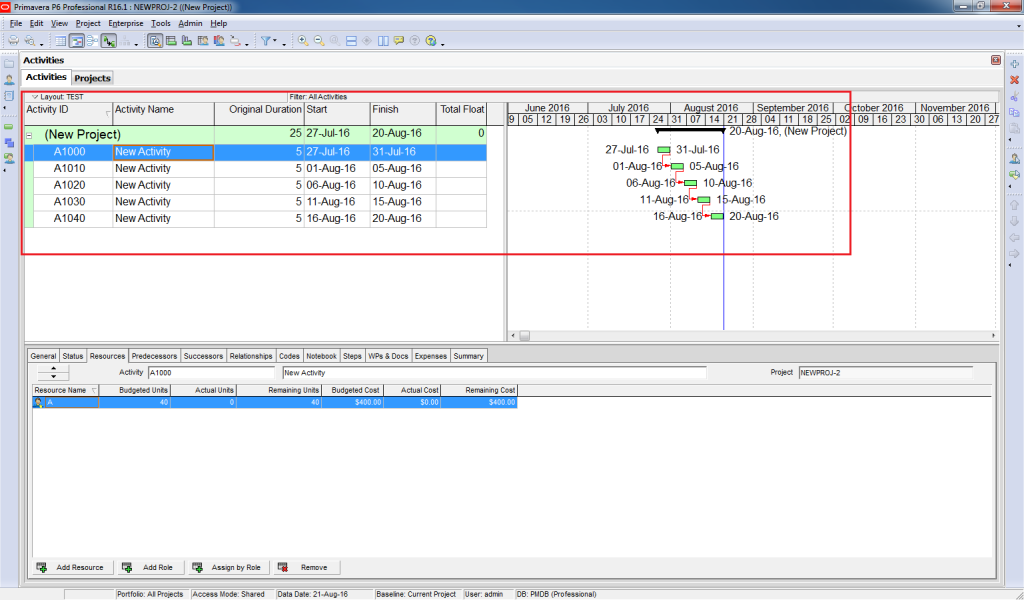
With this, resource actual data has been removed.
STEP 3: Reset the Activity Date
The next step is resetting the activity date. To do so, go to Tool -> Global Change. Click New. Select the value as illustrated in the image below:

Click on the Change button. Primavera will show you the preview of the change.
Click on Commit Changes.
This will result in the removal of the date of the actual data.
STEP 4: Reset the Data Date
To reset the Data Date, click F9 and select Data Date equal to the Project Planned Start date.
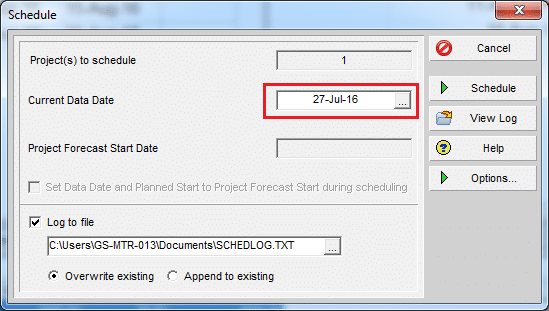

Click Schedule.
Following these steps will result in the removal of all the actuals from your schedule and having the “As-Planned” schedule.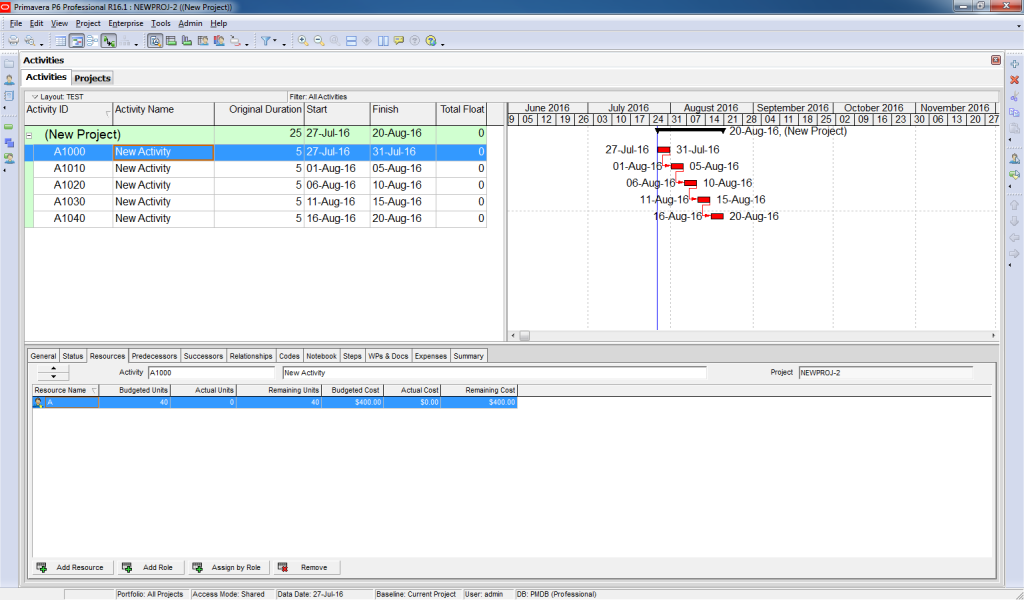
If you have any question about this post, please submit them down below.
Additional Resources:

About the Author, Khuong Do
 Khuong Do is a Project Planner in Civil Engineering, Transportation, and Oil & Gas Industry. He has worked as a Primavera Consultant Specialist since 2006 and willing to share his passion for Primavera through lots of Tips & Trick on his personal blog.
He holds a Civil Engineering degree and a Bachelor of Information Management System. Now he is working in Petronas RAPID project, one of the biggest Refinery and Petrochemical complex, in Pengerang – Malaysia


![[Free 90-min Masterclass] How to Avoid Project Delays Turning into Costly Claims](https://www.projectcontrolacademy.com/wp-content/uploads/2025/08/September-2025-Webcast-Chris-Carson-H01-Yellow-2048x1152.jpg.webp)
![[Free 90-min Masterclass] The Ultimate Leadership Recipe for Project Professionals](https://www.projectcontrolacademy.com/wp-content/uploads/2024/08/4-2048x1152.jpg.webp)


